- Iran,Tehran,Jordan,East Arash Boulevard,No.6,Unit 4
Aren Law Institute was established with the cooperation of a group of graduates and continues to this day with the aim of accepting lawyers.

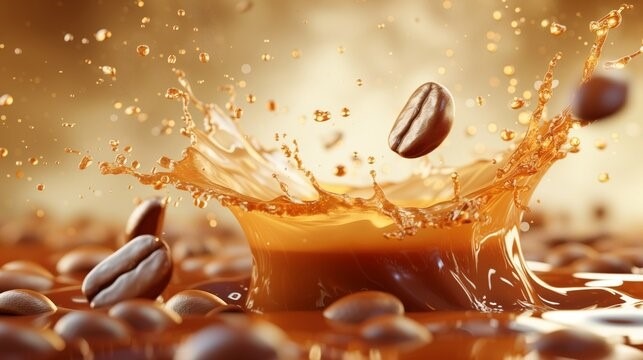
Splash is a fascinating and creative photography technique that captures the moments of liquid splashing or splashing. This type of photography can create very beautiful and impressive images due to the precision and timing it requires. It is best to get help from an assistant for this type of photography.
To start, set your camera’s shooting mode to High Speed Photography so that you can shoot continuously at a high shutter speed. Secure the camera on a tripod and mentally visualize the image you want before you start shooting. This will help you plan carefully and consider important factors such as where the subject will land, how the liquid will spread, and how much liquid you need. It is also necessary to adjust the distance between the lens and the liquid spill, and if you are using a lot of liquid, pay special attention to keeping electrical cables away and preventing damage to the background.
To create splashes, you can use different liquids such as water, milk, paint or colored drinks, and create more interesting visual effects by combining different colors. In some cases, you can use materials that look similar to real materials.
Before you start shooting, practice a few times to get the timing right and control your splash and landing. Before you start, focus on where your subject will land. Place your subject where it will land and check your focus. If your subject hits the surface of the liquid with more force, you will get more splash, but be careful not to let the liquid droplets block your view of your subject.
For splash photography, your shutter speed needs to be very fast to freeze the moment the liquid is splashing. Typically, shutter speeds are set to 1/1000th of a second or faster to capture the details of the liquid droplets in the air. Of course, if you use a slower shutter speed, the droplets will stretch out, which can create an interesting shape.
To create a shallow depth of field and focus on a specific part of the image, use a low f-number aperture, such as f/1.8 or f/2.8. This helps separate the liquid from the background, but it can also blur the subject. To ensure full clarity of the liquid spread, you can set the aperture to f/8 to f/16 so that all the liquid spread is clearly visible in the image.
In low light conditions you may need to increase the ISO, but be careful not to increase the image noise. A lower ISO setting will usually give better results for large prints.
For lighting, you can use 800 or 1000 watt cinema lights or strong LED lights to illuminate the subject and liquid well. If you do not have access to strong lights, you can do this technique outdoors in sunlight and use a diffuser to control the light.
When doing this technique with regular flashes, we cannot use a high shutter speed; because the speed of light does not match the shutter speed and half of the photo will be dark. Using high-speed flashes (Strobe) is very effective in this type of photography, because these flashes allow for high-speed shooting and capture the precise details of the splash. High-speed flashes can support shutter speeds up to 1/8000 second. Note that in this technique, the duration of the flash light is more important than the shutter speed, because this is the duration of the light that stops the movement.
After taking the photos, you can use software like Adobe Photoshop or Lightroom to make final adjustments to the image. These adjustments include improving contrast, brightness, and cropping the image. If you don’t get the image you want, you can photograph the subject separately with invisible thread suspended in the air and hit it with a glass or colorless object that is heavier than your subject on the surface of the liquid and photograph it. Then edit in the software and combine the images. For more interest, you can separate some of the drops and place them on the subject to make the photo feel more natural. However, the appeal of this technique is its realism, so practice and repeat until you achieve the desired result without the need for many edits. Also, if you are using flammable liquids or chemicals, be sure to ensure safety and necessary protection.
The Difference Between Framing and Composition
Framing refers to how the camera is positioned and the area in which the image is captured. In essence, framing is about choosing the angle, distance, and position of the camera in relation to the subject. The purpose of framing is to determine what parts of the scene are included in the image and what parts are excluded. Composition refers to how the visual elements are organized and arranged within the frame of the image. Composition involves choosing colors, patterns, lines, textures, and other visual elements that help create an attractive and meaningful image. The goal of composition is to give the image harmony, balance, and meaning.
Comments are closed.

written by:
written by:
written by:
Very good